Effective Ways to Remove Mud Stains From Your Couch
Say goodbye to the frustration of mud stains marring the beauty of your couch! Whether it’s your exuberant pets or spirited children leaving their muddy marks, we understand the struggle. Swift and efficient action is the key to restoring your furniture to its immaculate state.
Join us on a journey through this comprehensive guide, where we unravel the secrets to effortlessly banishing mud stains and mastering the art of upholstery cleaning. So, you can enjoy your pristine living space without a worry in the world.
Step 1: Quick Action for Fresh Stains
Start by blotting up fresh wet mud stains with a dry cloth. Avoid wiping, as it may cause the stain to spread.
If the stain has dried, use a dull utensil like a plastic spoon or a soft-bristled brush to scrape away as much mud as possible.
Step 2: Gentle Cleaning with a Toothbrush
Dampen an old toothbrush with warm water.
Dip the toothbrush into a bleach-free liquid laundry detergent.
Work the detergent into the stain and let it sit for 10 to 15 minutes.
Step 3: Vinegar Solution for Deeper Cleaning
Mix equal parts white vinegar and water.
Dip a clean cloth or sponge into the solution, wringing it out well.
Blot the area to rinse away the soap and residual mud.
Step 4: Finishing Touches for Quick Drying
Sprinkle baking soda over the stain to expedite drying.
Allow it to sit for 30 to 45 minutes.
Brush away the baking soda with a soft-bristled brush once it dries.
By following these steps, you can effectively remove mud stains from your couch, ensuring a clean and inviting living space for you and your guests.
Wrapping Up!
In conclusion, tackling mud stains on your couch is a breeze with swift action and our simple guide. From quick responses to fresh stains to a gentle toothbrush clean and a powerful vinegar solution, you can bid farewell to unsightly marks. Finish with a sprinkle of baking soda for quick drying, and your couch will be spotless, offering a worry-free and inviting living space. Say goodbye to mud-stained worries and hello to a beautifully clean home!
Frequently Asked Questions
Q: Can I use any laundry detergent?
It’s crucial to use a bleach-free liquid laundry detergent to avoid damaging your couch’s fabric.
Q: How long should I let the vinegar solution sit?
Let the vinegar solution sit for 10 to 15 minutes to allow it to penetrate and lift the stain effectively.
Q: Will the baking soda damage my couch?
No, baking soda is safe for most couch fabrics and helps in quick drying without causing harm.
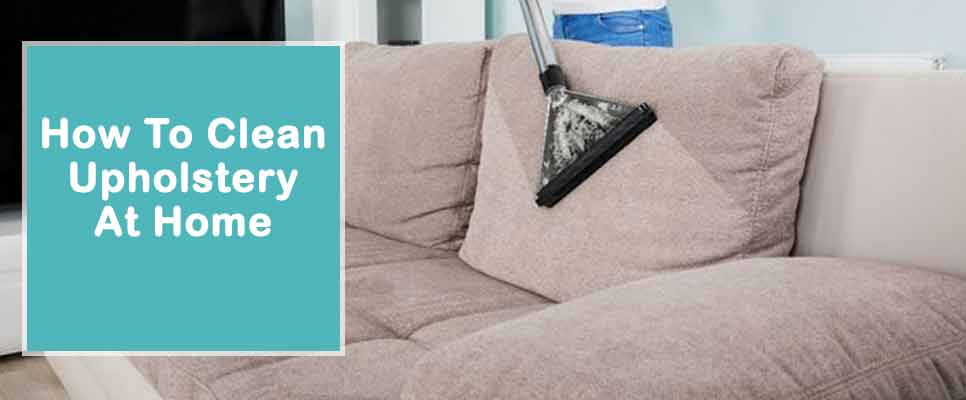
Improving the beauty of your house, upholstered furniture acts as a central location for both relaxation and daily activities. Upholstery gathers allergens, dust, grime, stains, and smells with time, which may be harmful to your health. This also detracts from the overall aesthetic appeal of your furniture. Frequentupholstery cleaning is essential for maintaining the longevity and beauty of your furniture. There are many ways and strategies used to clean upholstery at home. And, you will get the proper knowledge about cleaning your upholstery.
Upholstery Tags Are Important In Cleaning- So Don’t Remove Them
It is compulsory to leave upholstery tags on your furniture because they are essential for proper cleaning and upkeep. By using the tag information, you will definitely know how to clean upholstery at home. They frequently come with rules that specify how to take care of, clean, and preserve the material. According to the instructions on these tags, you may avoid any damage, discolouration, or shrinking. You can prevent issues that could result from using the wrong cleaning techniques.
Upholstery Fabric Cleaning Codes And How To Use Them For Cleaning
It is crucial to understand fabric cleaning standards to properly maintain upholstery. These codes, which offer instructions on how to clean upholstery at home, are normally located on upholstery tags. The following are common fabric washing codes along with their definitions:
W (Water): Water-based cleaning treatments, such as upholstery cleaner or light detergent, can be used to clean fabric.
S (Solvent): Steer clear of water-based cleaning supplies and exclusively use solvent-based ones.
WS (Water/Solvent): This tag means that you can clean upholstery with both techniques water and solvent-based cleaners.
X (Vacuum Only): No liquid cleaning techniques should be used; instead, the fabric should only be lightly brushed or vacuumed.
By being aware of these regulations, you can use the proper cleaning technique and keep your upholstery’s integrity and beauty intact.
Step By Step Guide on How To Clean Upholstery At Home
Appearance and texture of your furniture with upholstery cleaning may improve the sanitary and welcoming sense of your living area. Here is how to clean the upholstery properly so that your treasured possessions stay in top shape: a step-by-step instruction.
Getting Ready for Cleaning
Assemble Supplies: Assemble the items required for cleaning. Collect a spray bottle, clean cloths, a bucket, a gentle brush, upholstery cleaner, light detergent, and white vinegar.
Examine the Fabric Tag: For cleaning guidelines, consult the fabric tag attached to the couch. The suggested cleaning technique (e.g., W, S, WS, or X) and any other relevant details will be specified.
Sweeping
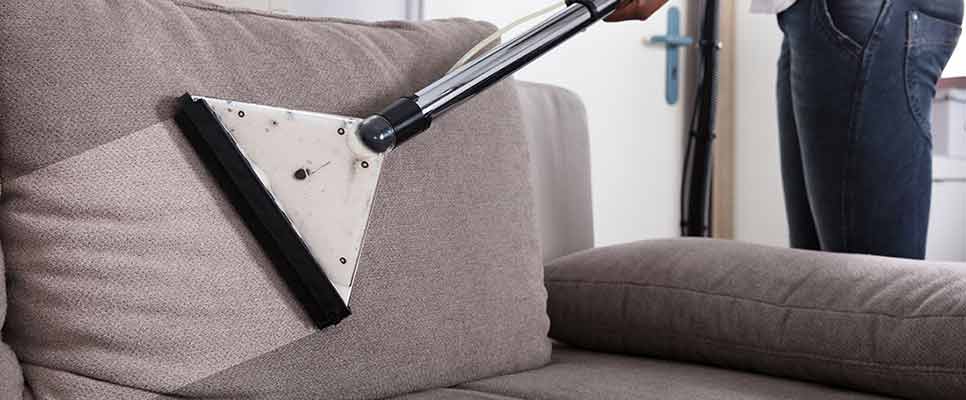
Start with Dry Cleaning: It is usually a good idea to start by giving the upholstery a thorough vacuum, regardless of the cleaning code. Dust, debris, and grime may be eliminated by using the brush attachment. Observe seams and nooks with particular attention when you do upholstery dry cleaning.
One-time Testing
Do a Spot Test: To make sure the cleaner doesn’t harm or discolour the upholstery, spot-test the upholstery before using any cleaning solution. Spot-test in accordance with the directions on the fabric tag.
Removal of Stains
Prioritise Stains: Take care of each stain separately if there are any noticeable ones on your upholstery. Using a clean cloth, dab away any liquid stains; for solid or sticky materials, use a spoon to carefully scrape them off. Avoid rubbing as this may cause the stain to seep more into the cloth.
Make Use of the Correct Cleaner: Determine the best upholstery cleaning technique (solvent- or water-based) based on the fabric tag and the spot test. Using a clean cloth, gently dab the discoloured area with a tiny quantity of cleanser. To stop the stain from spreading, work from the outside edges towards the centre.
Rinse with Water: Use clean water to rinse the cleansed area after upholstery stain removal. To get rid of any last bits of cleaning solution, blot it with a moist towel.
All-purpose Cleaning
Get the Cleaning Solution Ready: Use a bucket to combine a small amount of water and mild detergent for water-based cleaning (W or WS). Use a solvent-based upholstery cleaner as directed by the manufacturer for solvent-based cleaning (S).
Apply the Cleaning Solution: Wet a clean cloth somewhat but not completely by dipping it into the cleaning solution and wringing it out. Wipe the surface of the upholstery gently. It is always best to blot rather than rub upholstery. Rubbing may cause stains or dirt to spread and harm the fibres of the cloth.
Towelling Off and Wiping
Rinse with Clean Water: To get rid of any detergent or cleaning solution residue, rinse the cleansed areas with a clean, moist towel after washing.
Use White Vinegar: To clean with water (W or WS), fill a spray bottle with equal parts water and white vinegar. To get rid of smells and balance out any detergent residue, lightly spray the upholstery.
Dry Completely: Let the upholstery air dry entirely. Till it dries, don’t use or sit on the furniture. You may use fans, open windows, or an oscillating fan to direct airflow to speed up drying.
Using a Brush and Fluffing
Brush the Fabric: After the upholstery has dried, gently fluff and restore the texture of the fabric using a gentle brush. To keep the fabric looking nice, brush along the direction of the cloth’s grain.
Repeated Vacuum
Final Vacuuming: To get rid of any remaining trash or particles, vacuum the upholstery one last time after brushing and fluffing.
Upkeep and Prevention
Frequent Vacuuming: Vacuum your upholstery on a regular basis to keep dirt and debris from building up. You may extend the life of your furniture by doing one easy step.
Use Slipcovers: To shield your upholstery from spills and stains, think about using slipcovers. Slipcovers are an easy method to keep your furniture looking nice and new because they are washable and detachable.
Observe Fabric Tags: Pay close attention to the washing guidelines listed on the fabric tag of the upholstery. A poor cleaning technique might cause the fabric to worsen.
Different Types of Upholstery Stains, You Should Not Ignore
If you notice these stains on your upholstery, you should not ignore them. Because they can cause permanent marks on the upholstery fibre. You can consider DIY methods for the upholstery stain removal or you can hire expert upholstery cleaners.
Wine stains
Grease stains
Paint stains
Food stains
Pet urine stains
Blood stains
Ink stains
Vomit stains
Water stains
Chocolate stains
Oil stains
Chewing gum marks
Mould stains
Colour stains
Drink stains
Some Specific Methods For Cleaning Different Kinds Of Upholstery.
Here are some specific methods for cleaning different kinds of upholstery.
How to Use Baking Soda to Clean Upholstery
First, determine which places require cleaning. See the care label attached to the upholstery for any restrictions or special directions.
Give the upholstery a good vacuum. This will help to get rid of loose dust, crumbs, and filth.
To ensure consistent covering, liberally sprinkle baking soda over the upholstery.
Using a soft brush or your hands, carefully rub the baking soda into the cloth. Give the baking soda at least 15 to 30 minutes to settle.
After the allotted time, use a brush attachment on your vacuum to extract the baking soda from the upholstery.
To leave your upholstery looking clean and smelling great, be sure to vacuum every nook and corner.
How to Maintain a Textile Chair
A fabric chair has to be cleaned carefully to preserve its look and increase its longevity. This is how you do it:
Determine the kind of fabric used on your chair and review the care guidelines about heat, moisture, and agitation.
To get loose dirt and debris out of the chair’s fabric, use a vacuum with a brush attachment.
Clean the fabric with the proper upholstery cleaner. Take care not to soak the cloth too much.
Using a towel or allowing it to air dry will depend on the cleaning solution that was used.
How to Keep a Lounge Clean
A sofa, or bigger piece of upholstered furniture, could take more time and work to clean. The following technique can help your lounge appear its best:
Find out what kind of fabric your sofa is made of and whether there are any lounge cleaning restrictions.
To get rid of any loose dirt or debris, start by cleaning the whole lounge.
Add a tiny bit of vinegar for extra cleaning power if needed.
Lightly agitate the fabric of the sofa by dabbing a clean towel with the cleaning solution to get rid of any stuck-on
To help the cloth regain its look, gently scrape its surface with a gentle brush.
Ensure that the sofa is completely dry after cleaning. When reusing it, let it air dry fully.
Ways to Maintain a Sofa
Sofas may accumulate dirt over time, therefore cleaning is essential to preserving both their aesthetic and hygienic state. How to clean a sofa is as follows:
Determine the fabric type of your couch to start, as various textiles may call for various cleaning procedures.
To get rid of any loose debris, dust, or crumbs from the sofa’s surface, use a vacuum with a brush attachment.
As directed by the manufacturer, apply upholstery shampoo to the sofa’s fabric.
According to the directions on the product, gently agitate the upholstery shampoo into the fabric.
Then, either extract the solution or allow it to air dry.
Use cold air to dry the couch as soon as possible for the best results.
To keep your couch fresh and clean, you might need to repeat these methods based on the fabric & level of soiledness.
How to Spot Clean a Sofa
Like sofas, couches need to be cleaned on a regular basis to keep them looking and feeling nice. How to clean a couch is as follows:
To start, determine the kind of fabric on your sofa. Various fabrics may require various methods of cleaning.
To get rid of dust and debris, use a vacuum with a brush attachment.
As the manufacturer directs, apply a suitable cleaning solution to the fabric.
According to the directions on the product, gently agitate the cleaning solution into the cloth before extracting it or letting it air dry.
Ways to Maintain Leather
Maintaining the quality and beauty of leather requires regular cleaning and conditioning. Here is how to properly clean leather furniture:
To begin with leather maintenance, ascertain the kind of leather you have.
To get rid of dust and debris from the leather surface, use a vacuum cleaner attachment with a brush. Take care not to scratch.
Upholstery shampoo and leather conditioner work well on coloured, aniline, or semi-aniline leather. Keep it dry if the leather is dyed to stop the colour from transferring.
Using a soft brush, apply the leather upholstery cleaning solution to tiny areas of the leather and gently brush it in.
To take away any extra moisture from the leather, use a dry cloth.
Use a leather conditioner or moisturiser to improve the lustre and suppleness of the leather. The appearance of your leather will last for years if you apply a conditioner on a regular basis.
We all know the unsettling sight of soot and charcoal stains on our beloved couches – those unsightly black marks and unpleasant odours that can ruin the appearance and ambience of any living space. These stains can result from various scenarios, such as house fires, overenthusiastic fireplace usage, or accidental transfer from other locations. Regardless of the cause, couch cleaning to remove soot and charcoal stains remains consistent. To restore your couch to its former glory after couch cleaning for these stains, it’s essential to act promptly as the longer these stains linger, the more challenging they become to eliminate through couch cleaning procedures.
Step 1: Ensure Dryness
The first step in the journey to a stain-free couch is to ensure it’s completely dry. If your couch has been exposed to a house fire, it may have been soaked during the firefighting process. To prevent mould and mildew growth, utilize dehumidifiers and fans to expedite the drying process. A dry surface is crucial for successful stain removal.
Step 2: Gentle Application of Absorbents
Once your couch is dry, it’s time to address the stains. Begin by gently sprinkling baking soda or cornstarch over the affected area. Be cautious not to rub it in, as this can further embed the soot into the fabric. Instead, apply the absorbent substance and leave it to work its magic.
Step 3: Allow the Solution to Settle
Allow the baking soda or cornstarch to sit undisturbed for at least an hour, or longer if possible. Patience is a virtue when dealing with these stubborn stains.
Step 4: Careful Vacuuming
After the waiting period, it’s time to remove the absorbent material. Use your vacuum cleaner, ensuring that it’s attachment-free and the nozzle is slightly elevated above the couch’s surface. This approach helps prevent the stain from being worked further into the fabric. With thorough vacuuming, a significant portion of the soot should be removed, paving the way for the next steps.
Step 5: Make Your Cleaning Solution
To tackle the remaining charcoal and soot stains, create a gentle yet effective cleaning solution. Mix two cups of water with one tablespoon of mild dishwashing liquid. This solution strikes the right balance between effectiveness and couch fabric care.
Step 6: Gentle Sponging
Wet a clean white cloth with the prepared cleaning solution, and use it to sponge the stain gently. Blot the affected area until the liquid has been absorbed.
Step 7: Persistent Stain Treatment
Continue sponging and blotting the affected areas until the stain is completely eradicated. The key here is persistence and patience.
Step 8: Rinse with Plain Water
Wet another clean white cloth with plain water, then sponge the previously stained areas. This step helps remove any residue of the cleaning solution and any lingering traces of soot or charcoal.
Step 9: Drying
To finish the process, blot the couch with a dry white cloth to absorb the water, ensuring that your couch is left clean, dry, and free of any residual stains.
Conclusion
In conclusion, dealing with soot and charcoal stains on your couch can be a challenging task, but it’s not impossible. By following these steps meticulously and acting swiftly, you can restore the beauty and cleanliness of your couch without compromising its fabric or structure.
Mould can be a pervasive problem in homes, and when it infiltrates your furniture upholstery, it poses not only an aesthetic concern but also a health risk. In this comprehensive guide, we’ll explore the most effective techniques for upholstery cleaning and removing mould and mildew from your furniture upholstery. Following our expert tips, you can safeguard your furniture and create a healthier living environment.
What Exactly Is Mould?
Mould, a type of microscopic fungal organism, thrives in humid environments. Your fabric furniture provides an ideal breeding ground for mould, especially if it’s made of organic materials. Moulds are omnipresent, both indoors and outdoors, and can grow in various conditions.
High humidity and warmth encourage mould to take root, and when conditions become unfavourable, moulds can disperse as spores and later regrow in suitable environments. Sometimes, mould can hide in plain sight, making it challenging to detect. It can lurk under wallpapers, and carpets, or manifest as invisible stains on walls and fabrics.
How Does Mould Damage Furniture Upholstery?
Mould, a type of fungus, thrives in moist and humid conditions. When it settles on your furniture upholstery, it can lead to several issues, including:
Stains: Mould can cause unsightly stains on your upholstery, ruining the aesthetics of your furniture.
Structural Damage: Prolonged exposure to mould can weaken the fabric, leading to structural damage.
Odours: Mould gives off a musty odour, making your furniture and living space less appealing.
Health Risks: Mould spores can become airborne and pose health risks, especially if you have allergies or respiratory conditions. The presence of mould in your home can trigger symptoms like coughing, sneezing, and skin rashes.
What Are The Health Risks Associated With Mould in Homes?
Understanding the health risks associated with mould is crucial, as it can affect your well-being and that of your family. Mould exposure can lead to:
Allergies: Mould spores can trigger allergies, causing symptoms such as sneezing, itchy eyes, and skin irritation.
Respiratory Issues: Mould can exacerbate respiratory conditions like asthma and bronchitis, leading to coughing and difficulty breathing.
Mould Allergies: Some individuals may develop mould allergies, which can have more severe symptoms.
Infections: In rare cases, mould exposure can lead to skin or lung infections.
Toxic Mould: Certain types of mould, like black mould (Stachybotrys chartarum), can produce mycotoxins that are harmful when inhaled.
To prevent these health risks and maintain your furniture’s integrity, it’s essential to address mould issues promptly.
Common Methods To Remove Mould From Upholstery
To effectively remove mould from upholstery, you need to identify the cause of the mould’s presence, whether it’s humidity, heat, lack of air circulation, or darkness. Once you’ve determined the root cause, consider these methods:
1. Using Vinegar
Vinegar, especially apple cider vinegar, is an effective mould remover. Its acidity can break down mould, but be cautious with the cleaning tools, as overly abrasive materials can damage the fabric. After scrubbing the mould with vinegar, use a soft cloth dipped in vinegar for a final pass to prevent future mould growth.
2. Carbonated Water or Baking Soda
If you don’t have vinegar, carbonated water and baking soda can also do the trick. Pour carbonated water on the affected area to allow the mould to rise, then use a cloth to remove it. Baking soda is also effective in removing and preventing mould growth.
3. Liquid Soap
A mixture of water and liquid soap can remove mould, but it’s gentler, making it suitable for fabrics with minor mould issues.
4. Clove Oil and Salt
For a natural approach, mix three drops of clove oil, a tablespoon of vinegar, and half a litre of water. Clean the mould with this mixture and sprinkle salt on it. Let it dry overnight, then vacuum the area the next day. Repeat if necessary until the mould is completely gone.
By following these steps, you can effectively remove mould from your furniture fabric, prolonging the life of your upholstery and ensuring a safe and healthy living environment.
Why Is It Essential To Understand The Harms Of Mould Before Removal?
Understanding the potential harms of mould, both to your furniture upholstery and your health, is crucial for several reasons:
Effective Removal: Awareness of the risks encourages you to take mould removal seriously and follow the proper procedures.
Prevention: Knowing the health risks of mould motivates you to take preventative measures, such as controlling humidity and ensuring good ventilation in your home.
Early Detection: Recognizing the early signs of mould damage allows you to address the issue before it becomes severe.
Health Protection: Prioritizing your health and the health of your family by promptly addressing mould issues is essential for a safe living environment.
Conclusion
In conclusion, mould removal from furniture upholstery is a task that should be taken with seriousness. The consequences of neglecting this issue can be both aesthetic and health-related. By following our expert tips and techniques, you can effectively remove mould, protect your furniture, and create a mould-free, healthy, and odour-free living space.
For further information and resources on mould removal and prevention, refer to reputable sources like the CDC, EPA, and WebMD.
Remember, a mould-free home and furniture upholstery are not just about aesthetics but also about your well-being. Take action today to ensure a healthier living space for you and your loved ones.
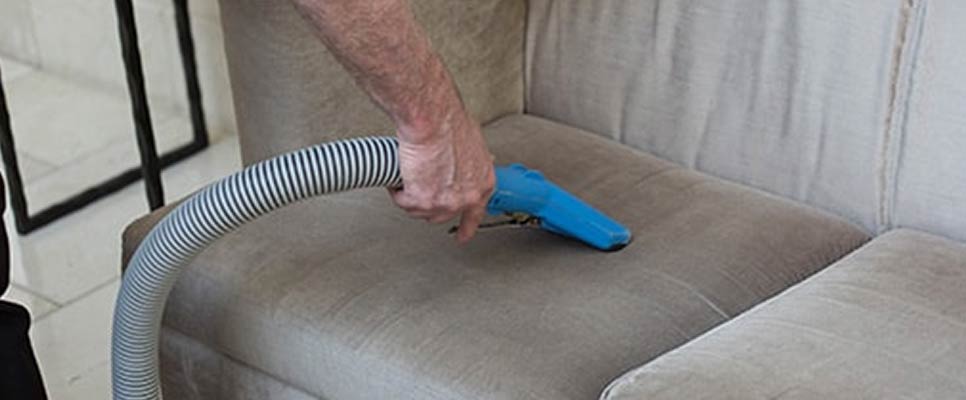
Steam cleaning your couch is an essential part of keeping it looking great. It not only gets rid of dirt, dust, and other debris, but it also helps to sanitize and deodorize your couch. But, how often should you steam clean your couch? It all depends on the usage of your couch and the type of fabric.
Generally, try to steam clean your couch every three to six months, depending on the condition of your couch. If you have kids or pets, or you have a large family, you may want to steam clean your couch more frequently. Additionally, if your couch is made of a delicate material, you may want to steam clean it more often to prevent damage. Steam cleaning your couch regularly also helps to prevent the build-up of dirt and dust, which can lead to allergies, asthma, and other breathing problems. Taking the time to steam clean your couch will help keep it looking and smelling great.
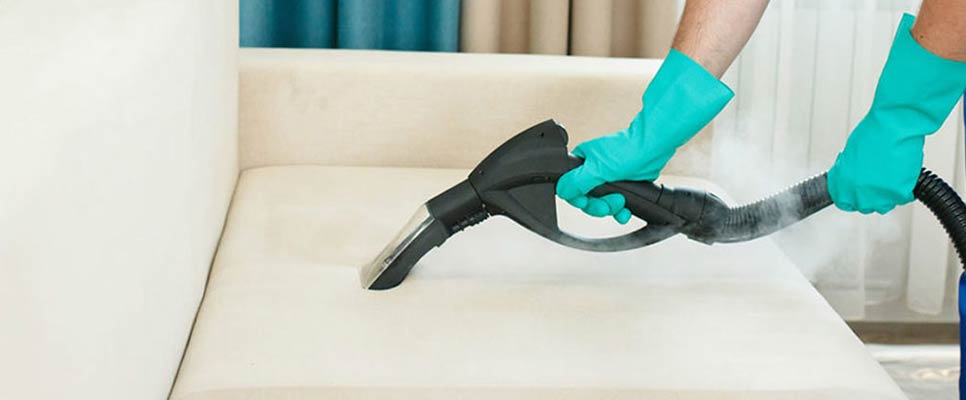
With the advent of the coronavirus pandemic, many people are looking for ways to keep their homes clean and sanitized. Upholstery cleaning using the steam cleaning method is becoming increasingly popular as an effective and safe way to clean furniture and other surfaces. You can also hire the best experts if you want to keep your couch clean & fresh.
But How Often Should You Steam Clean Your Couch?
Steam cleaning is a great way to keep your couch looking and smelling fresh. The hot steam can remove dirt, dust, and bacteria from the surface of the couch and from deep within the cushions.
Steam cleaning is especially effective at removing pet dander, dust mites, and other allergens that can accumulate in furniture over time. The frequency of steam cleaning your couch depends on how often you use it. If you use the couch daily, then try to clean it at least once a month. If you use it only occasionally, once every three to six months may be sufficient.
However, if you have pets or young children, steam cleaning your couch more often is a good idea. Pets and children can quickly track dirt and other debris onto the couch, and steam cleaning can help keep it clean. So, if you have pets or young children, you should consider steam cleaning your couch every two to four weeks.
When steam cleaning your couch, it’s important to use the right tools. First, use a vacuum cleaner to remove any loose dirt and debris. Then, use a steam cleaner to deep clean the couch. Make sure you follow the manufacturer’s instructions when using the steam cleaner.
You should also use a gentle cleaning solution when steam cleaning your couch. Avoid harsh chemicals or abrasive cleaners, as these can damage the fabric. Instead, use a mild detergent or fabric cleaner specifically designed for use on upholstery. Finally, make sure you allow your couch to dry completely before using it. If you don’t, the moisture can cause mildew and other damage to the fabric.
Conclusion
In conclusion, steam cleaning your couch is an effective way to keep it looking and smelling fresh. The frequency of steam cleaning will depend on how often the couch is used. Generally, if your couch is used daily, it should be steam cleaned at least once a month. If you use it occasionally, once every three to six months may be sufficient. If you have pets or young children, steam cleaning your couch every two to four weeks is important. Lastly, be sure to use the right tools and a gentle Karls Couch Cleaning Brisbane solution, and allow the couch to dry completely before using it.
There’s nothing quite like sinking into your favourite fabric couch at the end of a long day. However, over time, fabric couches can start to look and smell less than fresh. Dirt, pet hair, spills, and stains can all accumulate and make your couch look dingy and uninviting. Luckily, there are some expert tips you can follow to clean your fabric couch and keep it looking its best. Read the blog till the end to know in detail about the 5 expert tips for cleaning fabric couches.
Here Are Five Expert Tips For Cleaning Fabric Couches
1. Vacuum Regularly
The first and most important step in keeping your fabric couch clean is to vacuum it regularly. This will help to remove any loose dirt, dust, and pet hair that has accumulated on the surface of your couch. Use a vacuum cleaner with a soft brush attachment to gently clean the surface of your couch without damaging the fabric. Make sure to vacuum the cushions, the crevices between the cushions, and the armrests and back of the couch as well.
2. Spot Clean Spills And Stains
Accidents happen, and spills and stains are inevitable when it comes to fabric couches. However, the key to keeping your couch looking its best is to clean up any spills or stains as soon as they happen. Use a clean, white cloth to blot the spill, taking care not to rub the stain deeper into the fabric. If the stain is particularly stubborn, you can use a fabric cleaner designed for the type of fabric your couch is made from. Always test any cleaner on a small, inconspicuous area of your couch first to make sure it doesn’t damage the fabric.
3. Use A Fabric Cleaner
If your fabric couch is looking particularly dingy or has a strong odour, it may be time to give it a deep clean. Use a fabric cleaner designed for your couch’s specific fabric type, and follow the manufacturer’s instructions carefully. Always test the cleaner on a small, inconspicuous area first to make sure it doesn’t damage the fabric. Make sure to thoroughly rinse the cleaner from the fabric after use, as any residue left behind can attract dirt and make your couch look dirty again quickly.
4. Protect The Fabric
Prevention is key when it comes to keeping your fabric couch looking clean and fresh. Consider using a fabric protector spray designed for the type of fabric your couch is made from. This will help to repel spills and stains and make them easier to clean up. You can also consider covering your couch with a throw blanket or slipcover to protect it from spills, stains, and pet hair.
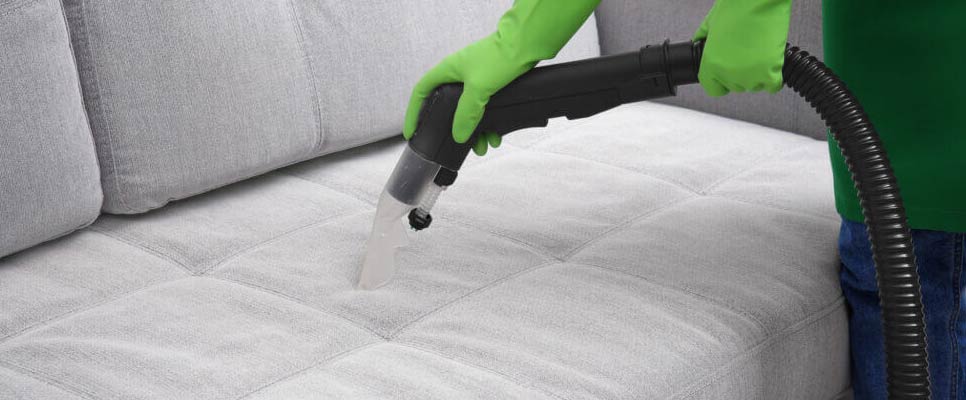
5. Use A Steam Cleaner
A steam cleaner can be a great tool for giving your fabric couch a deep clean. It uses high-pressure steam to penetrate deep into the fabric and remove dirt and stains. Make sure to follow the manufacturer’s instructions carefully and test the steam cleaner on a small, inconspicuous area first to make sure it doesn’t damage the fabric. You may also want to consider hiring a professional upholstery cleaner to steam clean your couch as they have advanced steam cleaners for cleaning the couch.
How Is Regular Couch Cleaning Beneficial?
Health Benefits
One of the primary reasons to keep your couch clean is to prevent the buildup of allergens, bacteria, and dust mites. Over time, your couch can become a breeding ground for these microorganisms, which can cause respiratory problems and allergies. Regular couch cleaning can help eliminate these harmful particles and create a healthier environment for you and your family.
Aesthetic Appeal
Regular couch cleaning can help maintain the appearance of your furniture. Over time, dirt, stains, and other debris can accumulate on your couch, making it look worn and dingy. By regularly cleaning your couch, you can keep it looking new and fresh, which can improve the overall aesthetic appeal of your living space.
Prolonged Lifespan
Regular couch cleaning can help prolong the lifespan of your furniture. Dirt and dust can accumulate in the crevices of your couch, causing the fabric to wear down over time. By removing these particles through regular cleaning, you can help preserve the integrity of the fabric and prevent premature wear and tear.
Improved Air Quality
Dirt and dust on your couch can not only affect the health of your family but can also affect the air quality of your home. These particles can become airborne, causing breathing difficulties and other respiratory problems. Regular couch cleaning can help eliminate these harmful particles and improve the overall air quality of your living space.
Cost Savings
Regular couch cleaning can also save you money in the long run. By keeping your furniture clean and well-maintained, you can help prevent the need for costly repairs or replacements down the road. Additionally, by removing dirt and debris from your couch, you can help prevent the need for professional cleaning services, which can be expensive.
Hire Professional Couch Cleaners
If you are searching for the best couch service providers, you can hire top-class cleaners at Karls Couch Cleaning. We have all the experience required for cleaning all kinds of stains from the couch.
Couches are very susceptible to oil stains and it is not an easy job to get rid of them once they get onto your couches; especially old ones. This oil stain doesn’t mean only foodstuff made of oil causes them but your bodily oils as well when you rest on couches. These bodily oil stains are what we call stubborn oil stains and thus we want you to know how to clean oil stains from your couch. You cannot avoid the accidental spilling of oils from happening, but you can remove them later if you keep reading our blog.
Remove Oil Stains From Your Couch With These Amazing Tips
There are several effective ways to your question on how to clean oil stains from your couch when you want our team to explain them. But before starting to implement a DIY tip on your couch to remove oil stains, you need to follow a few instructions. They are to check manufacturer labels, do colour fastness and shrinkage testing on the couch fabric, etc. Then, proceed with any of the following procedures:
1. Cornstarch
Take a cup of cornstarch and pour a generous amount of cornstarch onto the areas of the couch stained by oil leaving behind stubborn marks.
When you follow the above step, make sure you are making a thick coat onto the affected area of your couch and let it stay for about 20 minutes.
After letting the cornstarch coating stay on the oil stains, it absorbs oil from the couch while not damaging your couch’s fabric in any way.
Once 20 minutes is up, then carefully gather the cornstarch powder in the coating using your hands and a paper towel. However, if you do not want to use your hands, then an alternate way is to use a toothbrush to gently proceed this step.
Now, take another old toothbrush to add a few drops of soap liquid to it. Then, use this to gently scrub over oil-stained areas.
Because the soap liquid helps in breaking down the chains in the oil assistant for the quick removal of overall oil stains from your couch. This process is a quick solution to get rid of oil stains from their roots.
If you complete the above step without any accidents, then proceed by taking a damp paper towel to clean the areas in a circular motion, where oil stains are removed.
Keep repeating this process while applying this soap liquid and cleaning it away with a damp paper towel until you find no oil stains on the couch.
2. Baking Soda With Soap Solution
The first and quick step you need to do immediately after oil stains get onto your couch is to dab off the excess oil from the couch fabric.
To do this, use a paper towel or tissue paper and dab it over the oil stains by applying pressure on them. Once a paper towel or tissue paper gets saturated, replace it with a new one to repeat this step until excess oil is removed.
The next step to remove the excess oil is breaking down oil residues using the commonly found ingredient in kitchens- Baking soda.
So, sprinkle this baking soda over affected areas of your couch as it has amazing absorption power. Allow the baking soda minimum of 5 hours or leave it overnight and then vacuum it off.
Even after allowing baking soda on oil stains overnight, it isn’t enough to remove oil stains from your couch. Thus, you need to do another effective step where mild dish soap should be used.
Take a tablespoon of mild dish soap and mix it in a cup of water and make it a blend while mixing is thoroughly.
Now apply this prepared blend to the oil stains and let it sit for around 20 minutes to later rinse the area with cold water.
Instead of cold water you can go for warm water but mix 4 to 5 drops of dishwashing liquid in it until suds are formed in it. Later, spray this directly over oil stains and wait for satisfactory results.
3. Ammonia And Water
You need to first cover the oil stains by taking mild dish soap and applying it over them. Then, let this sit for about 15 to 20 minutes.
Now use a moist cloth to reach the stained area of your couch with an addition of warm water to the cloth.
The next step is to mix a 1:1 ratio of ammonia and water and applied it over oil stains using a dry sponge and scrub the area thoroughly but gently.
Once scrubbing is done, you need to take a baby wipe to carefully scrub the stain again. Because the alcohol in it has the characteristic features to break down oil.
If you still find lingering stains of oil, dip a clean white cloth into a cup of water and hydrogen peroxide. Rub this over oil stains to await the positive results.
An alternative to not finding ammonia is to go with alcohol and make it a spraying solution by adding it to water.
As soon as you prepared the praying solution for the removal of oil saying you can jump to proceed with the same process as above.
Do repeat the complete oil removal process until you find there are no more oil stains on your couch making it stain-free.
Conclusion
A professional company that provides couch cleaning services is all you need if you do not want to remove oil stains by yourself. Do you not have any idea how to clean oil stains from your couch? This is fine because professional couch cleaners got your back as they can make your couch shine and bright. Counting on couch cleaners from a recognised company is like getting an assurance of safety for your couch. So, trust in experts’ expertise and skills in handling all kinds of couch problems. Therefore, book professionals today, without hesitation!
A fun gathering with friends or family can quickly become a frenzy to remove red wine stains from your precious upholstery. Promptly removing red wine stains is crucial, as the longer they linger, the more challenging they become to eliminate. This blog post will explore some DIY hacks to remove red wine stains from upholstery, ensuring that your furniture remains in top-notch condition.
Understanding Red Wine Stains
Before going into the DIY methods, it’s crucial to grasp the makeup of red wine and its impact on upholstery. Tannins in red wine are the primary culprits for the rich hue and stubborn stains they create. Factors like fabric type influence the severity of the stain, how long the stain has been present, and the particular wine involved. As a result, understanding the nature of the problem assists in formulating an effective plan for removal.
Fabric Types and Stain Removal
Different upholstery fabrics react differently to red wine stains and upholstery cleaning solutions. Knowing the type of fabric you’re dealing with is crucial before attempting to remove the stain. Here are some common fabric types and their response to red wine stains.
Synthetic fabrics: Polyester, nylon, and other synthetic fabrics are typically more stain-resistant than natural fibres. These fabrics often respond well to the DIY hacks.
Natural fabrics: Cotton, linen, and silk are more susceptible to staining due to their porous nature. These fabrics may require more care and multiple treatments when removing red wine stains.
Blended fabrics: Combining natural and synthetic fibres, such as a cotton-polyester blend, may offer some stain resistance. However, the blend ratio will determine how effectively the stain can be removed.
DIY Hacks to Remove Red Wine Stains from Upholstery
Go through the hacks to clean red wine stains below for a spotless cleaning!
Hack 1: Blotting the Stain
The first step in tackling a red wine stain is to blot the excess liquid using a clean, white cloth or paper towel. Dont, rub the stain, as this can cause it to spread deeply in the fabric. Blot gently, working from the outside edges of the stain towards the centre. This initial step is crucial for any of the following hacks to remove red wine stains from upholstery effectively.
Hack 2: Salt and Baking Soda Mixture
After blotting, mix equal salt and baking soda to create a paste, then apply it to the stain. Leave the mixture to settle on the red wine stain for about 05-10 minutes; after 10 minutes, gently brush it with a soft-bristled brush. The salt and baking soda mixture helps absorb the wine and remove the stain from the fabric, making this an intense hack in your stain-fighting arsenal.
Hack 3: Hydrogen Peroxide Solution
Next, consider trying a hydrogen peroxide solution. Take both, now mix one part hydrogen peroxide with two parts water in a spray bottle. Spray the solution directly onto the red wine stain, then blot it with a clean cloth. The hydrogen peroxide works as a bleaching agent, which helps to break down the stain. This DIY hack to remove red wine stains from upholstery can be particularly useful for lighter-coloured fabrics.
Hack 4: Vinegar and Dish Soap Solution
Another effective remedy is a vinegar and dish soap solution. Mix 1 Tbsp of white vinegar with 1 Tbsp of dish soap and 2 cups of cold water. Apply the solution to the stain by gently patting it with a clean cloth. After a few minutes, blot the area with another clean, dry cloth. Continue to repeat the procedure until the stain has been eliminated. The combination of vinegar and dish soap helps break down the tannins in the red wine, making it easier to lift the stain from the upholstery.
Hack 5: Club Soda
Club soda can also be used to remove red wine stains from upholstery. Apply a small quantity of club soda onto the stain and carefully dab it with a clean cloth. The carbonation in the club soda helps to lift the stain from the fabric, while the sodium content helps to neutralize the acidic wine.
Hack 6: Commercial Stain Removers
Consider using a commercial stain remover specifically designed for red wine stains if all else fails. Follow the manufacturer’s instructions carefully to ensure the product suits your upholstery. Many of these products are formulated to target red wine stains effectively, making them a valuable addition to your cleaning toolkit.
Hack 7: Rubbing Alcohol
Rubbing alcohol, or isopropyl alcohol, can be an effective DIY hack for removing red wine stains from upholstery. Dampen a clean cloth with rubbing alcohol and gently dab the stain, working from the outside in. After applying the alcohol, blot the area with a dry cloth to remove the dissolved stain. To prevent red wine stains, repeat the process until the stain is no longer visible.
Preventing Red Wine Stains
The best way to deal with red wine stains is to prevent them from occurring in the first place. Here are some tips for avoiding spills and stains on your upholstery:
Use coasters and placemats: Place them on your furniture to protect it from spills and stains.
Choose spill-resistant fabrics: Opt for upholstery fabrics that are water and stain-resistant to minimize the risk of staining.
Apply fabric protectants: Use fabric protectants, such as Scotchgard, to add an extra layer of protection to your upholstery.
Practice caution: Encourage guests to be careful when handling red wine, and keep it away from the edges of tables and other surfaces.
Precautions to Consider
When using any of these DIY hacks, it’s crucial to test the solution on a small, inconspicuous patch of your upholstery to ensure it doesn’t damage the fabric. Avoid using hot water or ironing the stained area, as this can cause the stain to set permanently. If the stain persists after multiple attempts or if you’re unsure about the cleaning process, seek professional help.
Additionally, when attempting these DIY hacks to remove red wine stains from upholstery, be patient and persistent. Some stains may require more than one treatment, and giving each method a fair chance before moving on to the next is essential.
Conclusion
In conclusion, DIY hacks to remove red wine stains from upholstery can be effective and affordable but require patience and care. Remember to blot the stain, experiment with various cleaning solutions, and always test a small area before proceeding. While these hacks may help in many cases, some stains require the expertise of professionals. If your upholstery remains stained after trying these DIY hacks, consider contacting a professional cleaning service to ensure the best results for your furniture. By being proactive and well-equipped, you can maintain your upholstery’s appearance and extend its lifespan.
Maintaining a pristine and cozy living environment starts with mastering the art of proper furniture care. A crucial component of this involves learning how to wash couch cushions and covers so they stay fresh and welcoming. In this in-depth guide, we will share the right way to wash couch cushions and covers using both handwashing and machine-washing methods.
Furthermore, we will explore the optimal cleaning frequency to ensure your cushions remain in excellent condition. Let the journey to a cleaner and more comfortable living space begin!
Know How To Wash Couch Cushions And Covers
Discover how to clean your couch cushions and covers effectively with our comprehensive guide. We’ll delve into the details of handwashing methods for a gentle touch and using a washing machine for a more convenient approach. Keep reading to learn the best techniques for maintaining your couch’s comfort and appearance.
What Is The Method For Handwashing Couch Cushions And Covers?
Handwashing couch cushions and covers can be an effective and gentle cleaning method. Follow below mentioned steps to achieve the best cleaning results:
Step 1: Assess Your Material
Before cleaning, examine the care label on your cushions and covers to determine the recommended cleaning techniques and any restrictions. Certain materials may not be suitable for handwashing or require specific cleaning solutions.
Step 2: Pre-cleaning
Vacuum your couch cushions and covers to remove loose dirt, dust, and debris. This preliminary step will make the subsequent cleaning process more efficient and effective.
Step 3: Treat Minor Stains
When encountering minor stains on your cushions and covers, mix a mild detergent with water. Next, apply the solution to the affected area using a clean cloth. Gently dab the mixture onto the stain and use a dry cloth to blot the area, effectively removing excess moisture.
Step 4: How can one effectively remove more challenging stains?
Use a stain removal product specifically designed for the upholstery to tackle tougher stains. Adhere to the manufacturer’s guidelines, apply the stain removal solution, and let it rest for the recommended period. Afterwards, carefully dab the stained area with a clean cloth to lift and eliminate the stain.
Step 5: How to Clean the Couch Cushions?
First, fill a big basin or sink with warm water and add some mild detergent. Next, carefully place the cushion covers in the sink and gently move them around to help release any dirt and grime that may be trapped in the fabric. Leave the covers to soak for at least 30 minutes, then rinse them well w2-3 times with clean water.
Step 6: What is the best method for drying sofa cushion covers?
Carefully wring out any excess water from the cushion covers, taking care not to damage the fabric. Lay the covers flat on a clean, dry towel, and then roll the towel up, applying gentle pressure to extract more moisture. Unroll the towel and let the covers air dry entirely before placing them back on the cushions.
Cleaning Couch Cushions and Covers in Washing Machine
For those who prefer using a washing machine for cleaning couch cushions and covers, follow these guidelines:
How to Machine Wash the Covers?
carefully check the label to verify the covers are machine washable and determine the appropriate wash settings.
To prepare the cushions for cleaning, remove their covers and treat any stains with a stain remover or a solution of mild detergent and water.
Load the covers into the washing machine without overstuffing them.
Choose a delicate cycle using cold water and incorporate a gentle detergent. Avoid applying bleach or fabric softeners.
After completing the wash cycle, either air-dry the covers or tumble-dry them on low heat, depending on the care label instructions.
Washing the Cushions
Examine the care label: Before washing the cushions, always check the care label to determine if they’re machine washable. Some materials may require special care or not be suitable for machine washing.
Pre-treatment: If you see any stain, remove it with the help of stain remover or a mixture of water and mild detergent before washing.
Load the cushions: If machine washing is permitted, place them in the machine without overstuffing them. Make sure they’re evenly distributed to maintain balance during the washing cycle.
Select the correct settings: Choose a gentle cycle and cold water to protect the cushions from damage. Use a mild detergent and avoid using bleach or fabric softeners, as they may affect the cushion material negatively.
Spin and rinse: After the washing cycle is complete, run an additional rinse cycle to ensure all the detergent has been removed from the cushions.
Drying the cushions: Thoroughly dry the cushions either by air-drying or using a tumble dryer on low heat, depending on the care label instructions. Before using them again, please ensure the cushions are completely dry to prevent mould and mildew growth.
Fluff and reshape: Once the cushions are dry, fluff and reshape them to maintain their original form and appearance.
Following these steps, you can effectively wash your couch cushions and keep them in excellent condition.
How Often To Clean Couch Cushions?
Regular cleaning is crucial for maintaining the appearance and cleanliness of your couch. Ideally, vacuum the cushions and spot-clean any stains as needed. For for washing and deep cleaning your couch cushions and covers every three to six months are recommended. This will help keep them looking fresh and prolong their lifespan. However, if you have allergies or pets, you should clean them more frequently.
Get Sofa Cushions and Covers Sparkling Clean
Apart from washing the covers and cushions, you can also revitalize them by sprinkling baking soda on them. After letting it sit for 30 minutes to an hour, vacuum it off to eliminate any persistent odours and keep your cushions smelling pleasant.
Summing Up
In conclusion, maintaining the cleanliness of your couch cushions and covers is essential for creating a cozy and inviting living space. By following the above guide on how to wash couch cushions and covers, you can effectively wash your couch cushions and covers either by hand or with the help of a washing machine.
Always check the cushion label and instructions mentioned to prevent any potential damage. With consistent cleaning and timely attention to stains, your couch will look and smell fantastic and enjoy an extended lifespan. Embrace the satisfaction of a spotless and welcoming sofa by keeping your cushions and covers impeccably clean!
Due to regular usage, your sofa can be the epitome of odours and dirt. Cleaning and washing the materials could be a hectic job. You can spend a large amount of money on washing your fabric or cleaning it professionally but when you have the best DIYs available why rely on others? Let’s find out some suitable solutions with the available house materials on How to clean the couch with vinegar?
If we talk about the best couch cleaning agent found in our homes, you should look for vinegar. You can search on any websites or read any books, for the best cleaning and washing materials, vinegar is always at the top. There’s nothing it can’t clean, from windows to walls it can make an outstanding effect, that can be hassle-free as well as friendly on your pocket. Hence the following article will let you know each detail about How to clean the couch with vinegar?
So that you no longer face any difficulty while applying it.
Vinegar- Creates Miracles In Your Upholstery Materials
As we have all read in chemistry acid reacts well with organic matter and helps in breaking and dissolving it. hence, vinegar is considered acidic that is very effective against water stains, scum, grease, and many more.
Now, the demand for vinegar is soo high just because it is eco-friendly and biodegradable. Along with these, it says a “NO” to various bacteria, as well as it is pocket friendly and easily available in the market.
let’s focus on the types of vinegar, that are suitable for cleaning
Now if we look at the availability of its types, there are numerous, like apple cider, rice wine, balsamic, and many more. But these can be inappropriate for cleaning. The following preparation can be the best for cleaning, let’s see:
A bottle of refined white vinegar: you have a prepare a solution, with a proper balance of acetic acid and water. Take that in an appropriate amount of 5-10% the former and 90-95% the latter one easily available in the market.
Best cleaning vinegar: another suitable solution could be 20-80% of acetic acid and water, which is available in any store. These can be the best for any type of cleanings in your house. Now if any question arises on How to clean the couch with vinegar? Do rely on this solution.
Let’s See Where You Should Not Use Vinegar
Vinegar is an awesome cleaning agent, but there are also certain areas that you should avoid. Let’s see those specific areas where vinegar can do worse than good like,
Any of the stone tiles
Floorings only the hardwood ones.
Any destroyed grouts
And of the organic carpets or rugs
Specific types of upholstery or incomplete leathers.
Cleaning your couch with only vinegar follows certain steps let’s see those steps to know more about How to clean the couch with vinegar?
First – Preparation Of Material
Take a spray bottle, and fill it with half of warm water, as water is best to break and dissolve the dirt and odour, making it swept away from your couch. You can also use an alternative to this, like club soda, that can fix it but added to this, it can cause a lot of bubbles due to its extra carbonation.
After that, take about 120ml of white vinegar and put it into that spray bottle. Do use a funnel so that it may not become a waste.
Thereafter, take a half tablespoon or 7,5ml of liquid soap for the best result, into the spray bottle. It helps remove grime and grease and can be the best cleaning material. Rub it gently so that it does not produce a lot of bubbles. Now if you do not want the fragrances do use the natural liquid soap. It is a dual effect, cleans your couch as well as does not keep its smell. After completing this solution you will not have any questions about How to clean the couch with vinegar?
Second- Ways Of Cleaning Couch
1. Put your sleepover on a side
Many of your couches have sleepovers, now before cleaning your couch, you should remove it, by simply unzipping it. you can easily clean it separately afterwards. As of now, your main focus is cleaning the couch. Now what happens if you do not know whether your couch has a sleepover or not
Find the zipper at the bottom seams of the cushions, there is a high chance that it hides there.
As the slipover can be washed separately, on warm water in the washing machine so you need not worry about that.
After washing the sleepover, you can wait till it dries there after you can again use it.
Use the vacuum cleaner for the dirt and crumbs
Now cleaning your sofa or couch regularly can be a bit difficult, but not vacuuming it regularly is possible. This practice will help you to remove any crumbs, dirt, and dust from your fabric. And you will be no more worried about your couch and will not have any doubt about How to clean the couch with vinegar?
2. Use any towel to dab out the wet strains
Removing the wet stain will automatically help to settle the vinegar solution easily on your couch and the cleaning process will be easier and more helpful.
3. Now apply the solution on your couch
If you have targeted any of the particular spots on the sofa then focus on that. But if you want to clean the sofa as a whole, then apply the vinegar with the help of a spray bottle on the sofa, with light mists. Allow the solution to rest on your fabrics for a few minutes before sponging it.
4. Be careful
The couch must not soak the water as the aim is to dampen it not to make it wet. As vinegar is best for neutralizing odour be careful about that.
5. Now with a cloth press the vinegar solution
Now as the solution is drying do not forget to pat it with a cloth so that the stains, dirt, and odour get removed. Pay more attention to the stains, and be careful with scrubbing if needed take a help of a toothbrush for the best cleanings.
6. Now wait for your couch to air dry
Once it is dried, your couch will look like a new one.
Conclusion
Cleaning a couch may seem to be a difficult yet expensive job. With the DIYs given above, you now have an idea of How to clean the couch with vinegar? The above methods are both pocket-friendly and hassle-free. Still, if you don’t like to take risk of cleaning on your own, seek a professional couch cleaning service.